alinah hansen
I am writing enthusiasts and, like to write about technology.

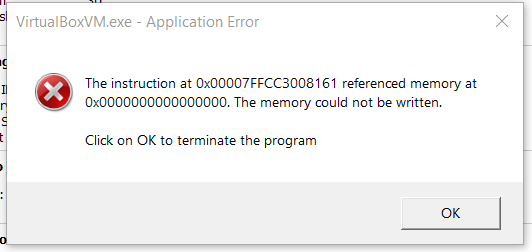
On all Windows 11, 10, 8.1, and 7 versions, some customers discover an odd issue that annoys them and affects many programs....

Image Credits: pixabay
Reply

On all Windows 11, 10, 8.1, and 7 versions, some customers discover an odd issue that annoys them and affects many programs. “The instruction at 0x00*** referenced memory at 0x00***” is the typical error message. “The memory could not be written,” is a common incident. However, as this problem persists in Windows even now, we will offer a thorough explanation of how to fix this error permanently.
Errors like “The memory could not be written” can occur due to various reasons. The error message often appears when a user tries to launch an internet-connected application (such as a game or graphic design program).
It can also appear when there are problems with the motherboard, BIOS, or Nvidia settings, or when damaged or outdated sound and display adapter drivers are present. This specific mistake can occur at any moment and frequently has no specific reason. If your PC is also facing this kind of problem and then encounters a software crash along with this error, following these instructions can help you get back on track.
The error’s actual text is quite obvious. A particular address is where data is kept in RAM. The program in issue requests data saved at a certain location when it needs it. Occasionally, for unknown reasons, this procedure fails. This error indicates that there is a problem with the address.
We’ve reached the actual issue now. We don’t know why the memory address was invalid, even though we are aware that it is a factor. This is one of the things that makes this specific issue so annoying. The good news is that you can locate the bug causing your memory errors by using some reasoning and inference.
Optimising virtual memory is the most popular solution for the memory could not be read problem. The pagefile.sys file, commonly referred to as virtual memory, is where Windows records information about how your machine manages high memory needs. It can assist in resolving the problem by allocating virtual memory. Here’s how to carry it out:
Step 1: Open the File Explorer by pressing the Win + E keys. Then, right-click the PC item and choose Properties.
Step 2: On the window’s left side, select the advanced system settings option.
Step 3: Select the Advanced tab and select the Performance section’s Settings button.
Step 4: Select the Virtual memory box and click the Change button under the advanced tab.
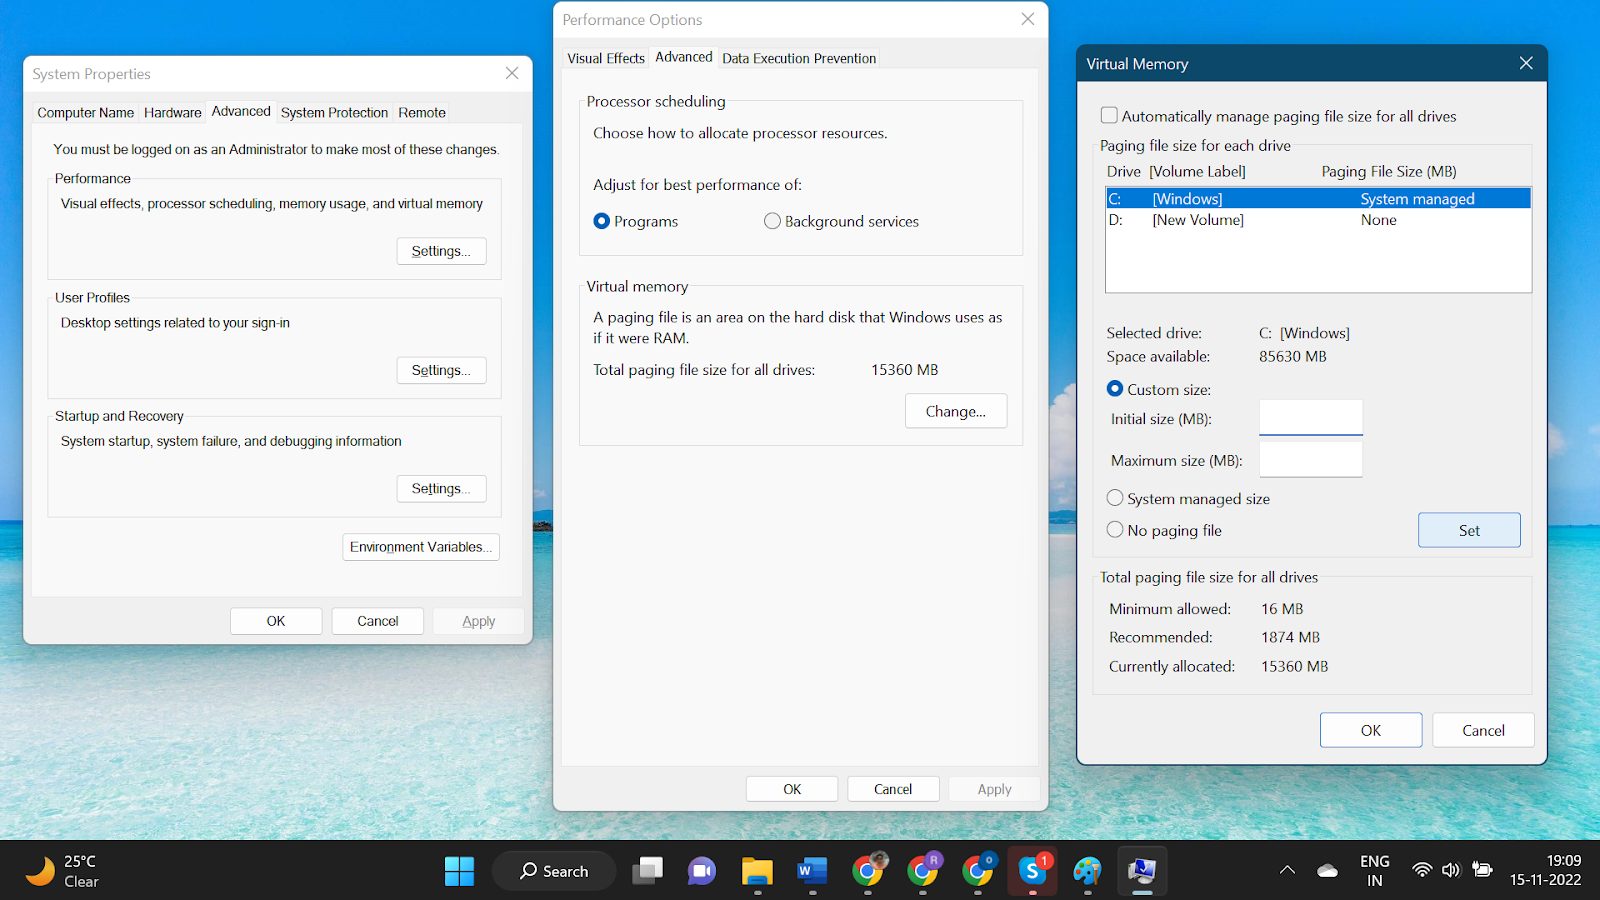
Step 5: Choose the desired drive and then click Custom Size. Next, input the actual RAM you currently have available in megabytes.
Step 6: To save the modifications, click OK. You may now restart your computer to see if the referenced memory error instruction still appears.
A competing third-party program might be the cause of the instruction-referenced memory problem. To resolve the app conflict and remove it, you may carry out a clean boot. You then have to install the proper version of the net Framework once again. Here is a little how-to for you:
Step 1: To open the Run dialogue box, use the Win + R keys. Type appwiz.cpl into the box and press Enter.
Step 2: Locate Net.Framework by scrolling down the list of installed programs, then right-click it and choose Uninstall.
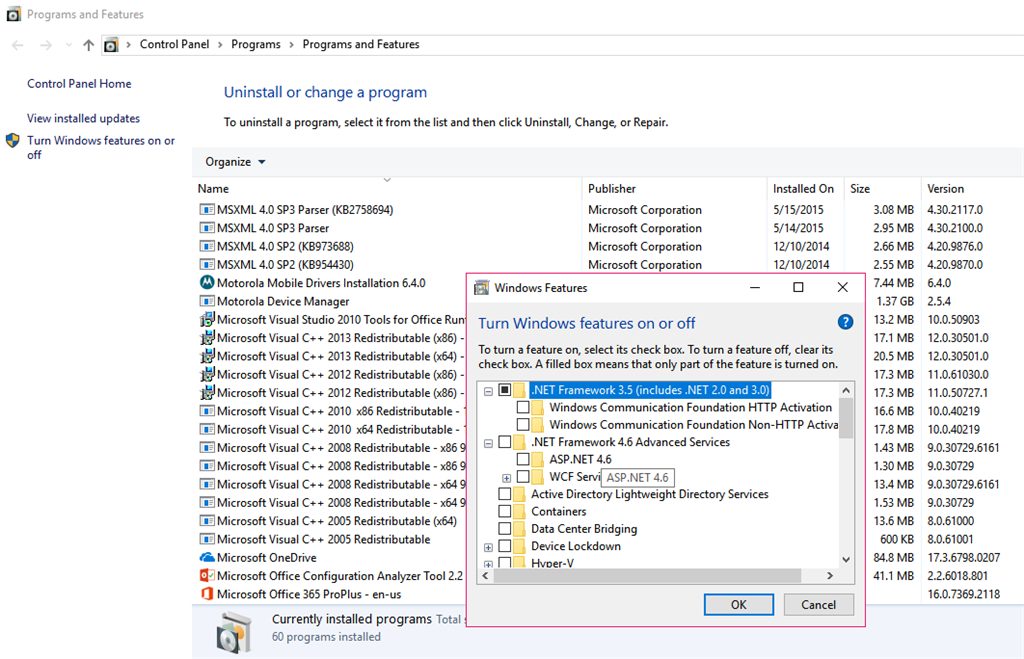
Step 3: After the uninstallation is finished, restart your computer and visit this link to download and install the appropriate version of the NET Framework.
The instruction at 0x0000 Windows 10 is caused by damaged system files on the C disc, as was previously mentioned. Currently, damaged system files are frequently repaired using a DISM and SFC scan.
Step 1: In the taskbar search box, type cmd. Click on the Run as Administrator option for the Command Prompt application.
Step 2: In the command prompt, use the sfc /scannow command. Please be patient as this procedure may take a long time to complete.
Step 3: Try utilizing the DISM tool if the SFC tool isn’t successful. In the elevated command prompt, type dism /Online /Cleanup-Image /RestoreHealth and press Enter.
You can now restart the machine to see whether or not the referenced memory problem has been fixed.
One of the best driver updater programs for Windows PCs is Advanced Driver Updater, which updates all of your device drivers automatically. Its powerful scan engine will locate and update all of your out-of-date device drivers. All current versions of Windows 11/10/8.1/8 and 7 (both 32-bit and 64-bit) are compatible with it.
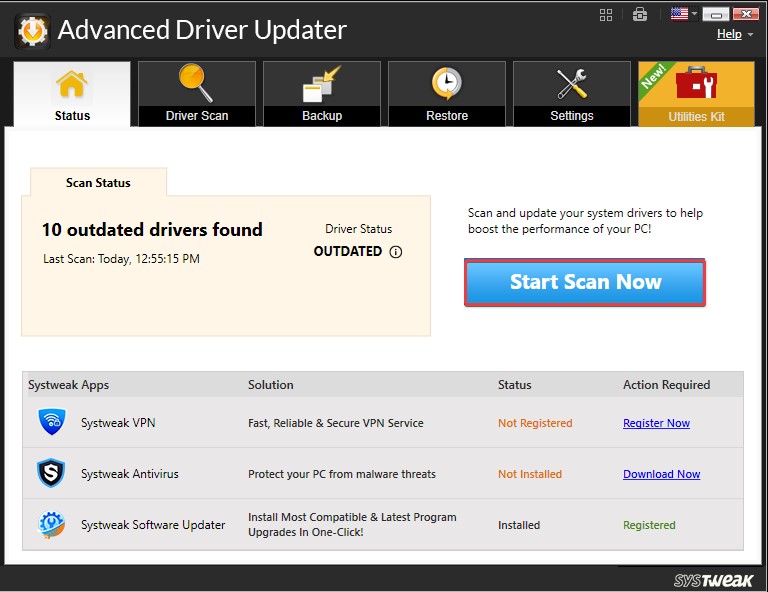
The vast driver database of Advanced Driver Updater is constantly being updated. It accesses the manufacturer’s website to obtain the most recent device drivers. Additionally, devices not included in the Microsoft Windows Updates are supported. Before making any changes, it quickly creates a backup so you may roll back drivers in the event of a driver disagreement.
The best tool for updating audio and graphics drivers is Advanced Driver Updater. High FPS gaming might help you achieve better gaming performance. Hardware problems with games, printers, graphics, audio, and other devices are best fixed by it. It downloads and installs all of the most recent device drivers automatically, thanks to its auto-update mechanism.
Features of Advanced Driver Updater
A feature-rich driver updater program is called Advanced Driver Updater. Some of the noteworthy attributes include the following.
How to Use Advanced Driver Updater?
Using Advanced Driver Updater is an easy task, as it is automated with limited steps.
Step 1: Access your browser and go to its official website.
Step 2: Click on the ‘ Purchase Now’ button to get the license key.
Step 3: Download the latest version of Advanced Driver Updater.
Step 4: Run the setup file and install the driver update software on your PC.
Step 5: Access Advanced Driver Updater and configure settings.
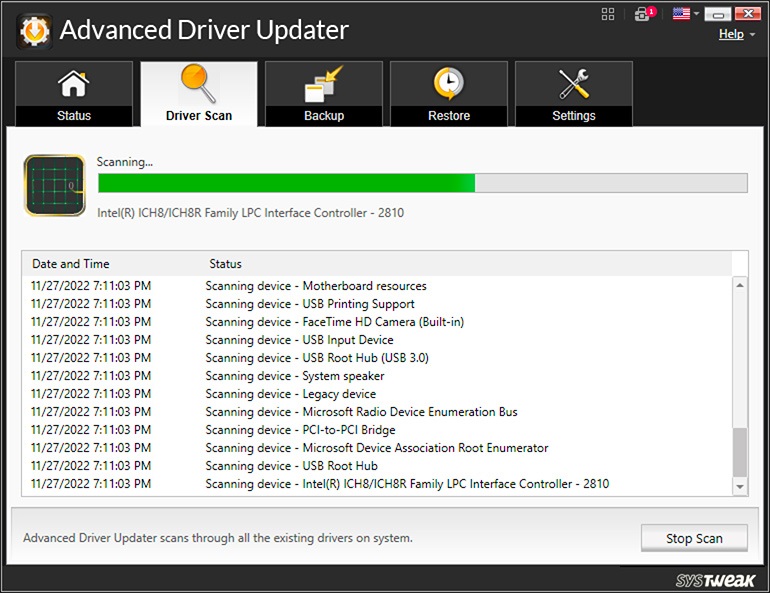
Step 6: Click on the “Start Scan Now” button to find all the outdated, missing, corrupt, or incompatible device drivers.
Step 7: Check out the list of outdated drivers that need to be updated.
Step 8: Click on a single driver or click on the ‘ Update All’ button to update all the faulty drivers in one go. Restart the PC and check if you still get the ‘ memory could not be written’ error.
Memory failures are, without a doubt, among the most frustrating issues that Windows users have encountered in the past. With any luck, the aforementioned procedures will assist you in determining and resolving the main reason behind the “memory could not be written” problem. If the memory diagnostic test returns errors related to RAM or if nothing else works, you should get your device examined by an expert. This is the sole method to find out whether any part of your system has a hardware problem that has to be fixed.
Suggested:
Types of Computer Memory Modules to Know About.
How to Fix the Errors of SBCGlobal Email Not Working on Android?
How To Fix All The Possible IP Address Errors?
Fix SQLite Error Code 11: Malformed Database Schema.


 How Background Checks Can Protect Businesses?: Mitigating Risk and Enhancing Security